PLUG –> Your Ethernet cable to port 2 of the Omron NX-EIP coupler in the 24VDC control panel of the cell and the other end of the cable to your computer’s ethernet port.
PRESS –> [ MENU ]
SELECT –> [ 6 ] 6 SETUP
SELECT –> [ 0 ] 0 NEXT
SELECT –> [ 0 ] 0 NEXT(depending on options installed)
You have to determine the “Common space measurements” for which you want to set a space function. Let’s say, for example, you want to set up a common space of 800 mm in X direction away from the robot of 450mm. In Y direction the length of the common space will be 2000mm centered according to World frame origin. Finally, the height of the common space will be 1400mm from Robot’s World frame origin starting below origin at -125mm. The set common space will be inside the taught zone.
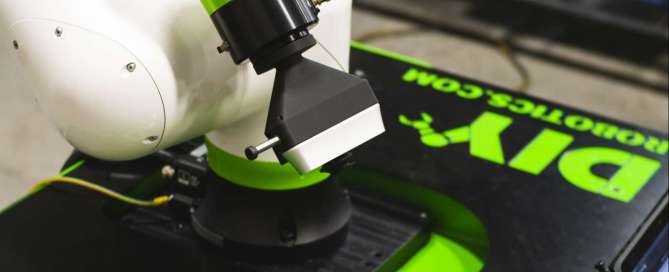
Using arrow, MOVE TO approach POINT 1 –> Move robot so the tip of teach pin is point to point in line with tip of the pointed tip placed in the robot’s direct environment.
PRESS -> [ SHIFT + F5 ] Shift [ RECORD ]
Using arrow, MOVE TO approach POINT 2 –> Do a 180° shift of the teach pin tip (jogging Joint 6). Then, move the robot to set the tip of teach tool to tip of the pointed tip set in the robot direct environment.
PRESS -> [ SHIFT + F5 ] Shift [ RECORD ]
Using arrow, MOVE TO approach POINT 3 –> With Joint 4 and 5, give the robot teach pin tip angle. Move the robot to set the tip of teach tool to tip of the pointed tip set in the robot direct environment.
There are many robotics forums on the internet, and it may be hard to know which ones are most reliable. Where is the best place to post your questions, ideas, or thoughts? Which ones are going to get you the most accurate answers? And which ones do the professionals trust? DIY-Robotics came up with a 5-point ranking system and rated a large sample of available forums on their activity, feedback, and user experience. In this article, we are proud to feature our picks for the top ten robotics forums.
#1 Robot Forum
Robot Forum is one of the best sites for engineers and programmers working with industrial robots. This forum brings together a worldwide network of roboticists to form a supportive and collaborative community. Robot Forum is a very active network known for providing high-quality, accurate answers and giving users a top-notch experience. Their site offers support for industrial robotics, Robot Math, and cobot help. They also have an extremely active discussion board. This versatile resource features a marketplace for robotic parts, and even provides resources for schools and education programs.
Activity and feedback level: 4.5/5
User experience: 4.5/5
Number of existing threads: 50,000 posts
#2 RoboDK Forum
RoboDK is perfect for any robotics enthusiast, no matter what your experience level. If you’re a beginner or a veteran, you’ll find a niche in this forum. You can participate in discussions and find answers to all of your RoboDK questions. If you’re unfamiliar with RoboDK, their simulation software and offline programming environment are among the best available. You can build a testbed to virtually program and run nearly any industrial robot. If you have questions about RoboDK software, industrial robotics, or robot programming, RoboDK forums are perfect for you.
Activity and feedback level: 4/5
User experience: 4.5/5
Number of existing threads: Over 4,000 posts
#3 RobotShop Community
RobotShop has created a community built around electronics, programming, robotic kits, and drones. An outstanding balance of fun, educational, and challenging resources are available through their online forum. Over a thousand members keep this community thriving and help answer questions ranging from the basic to the advanced.
Activity and feedback level: 4.5/5
User experience: 3.5/5
Number of existing threads: Over 36,000 posts
#4 ROBOTC Forum
ROBOTC is an innovative, C-based programming environment that was created at Carnegie-Melon University. Their program is fully integrable with Arduino, Hi-Technics, and even the LEGO Mindstorms platforms. Since ROBOTC was designed for education, you can expect their forums are packed with helpful tutorials, resources, and friendly moderators.
Activity and feedback level: 4/5
User experience: 3/5
Number of existing threads: Over 32,000 posts
#5 Robot Reviews
Robot Reviews has a massive community of over 250,000 unique visitors every month. Like most forums, you can get your questions answered, discuss breaking news, and interact with like-minded enthusiasts. But what makes Robot Reviews unique is how much the user can do on their site. Users can create their own blogs, message boards, and submit user-written articles. You can contribute to the world’s largest Robot Wiki, or even write features that may end up on the site’s front page!
Activity and feedback level: 4/5
User experience: 4.5/5
Number of existing threads: Over 149,000 posts
#6 Trossen Robotics Community
Trossen Robotics features one of the best-known and most respected communities of roboticists online. The Trossen Robotics Community (TRC) comprises an international network devoted to sharing and discussing questions, solutions, projects, and more. TRC is perfect for those who want to discuss humanoid robots, mechbots, construction robots, as well as Arduino and DIY projects.
Activity and feedback level: 4/5
User experience: 4/5
Number of existing threads: Over 70,000 posts
#7 – Society of Robots
If you want to build a robot or have some experience that could help others, the Society of Robots is a terrific resource. The Society of Robots’ forum features real-time chat, a question-answering AI, and the largest robot-building community on the web. Great for beginners who want to know where to start.
Activity and feedback level: 4/5
User experience: 2.5/5
Number of existing threads: Over 122,000 posts
#8 – RobotStudio Forum
ABB is a highly-regarded leader in the robotics industry. Well known for its robotics and automation solutions, ABB is a trusted stakeholder in the production of sustainable technology. ABB’s forum, RobotStudio, features high-tech simulations, programming environments, and troubleshooting resources. From their robot controllers to their various SDKs, RobotStudio brings ABB’s innovative tech to thousands of registered users.
Activity and feedback level: 3.5/5
User experience: 4.5/5
Number of existing threads: Over 10,000 posts
#9 DF Robot
For support with Arduino, Vortex, 3D Printing, and numerous visual programming languages, DFRobot’s Forums is a fantastic resource. This community caters to DIY hobbyists but is still a great place to find support and answers for engineering-related questions. The DFRobot Maker Community is a perfect introduction to the robotics community for beginners and home enthusiasts.
Activity and feedback level: 4/5
User experience: 3/5
Number of existing threads: Over 17,000 posts
#10 VEX Forum
VEX is a well-established professional, educational, and hobbyist resource. Their selection of motors, controllers, hardware, and educational materials are trusted by professionals and students alike. One of the FIRST Robotics program’s primary sponsors, VEX is committed to providing clear, accurate, and updated resources on their forum. You can expect quick replies from knowledgeable professionals who are ready to help with any level of problem.
Activity and feedback level: 5/5
User experience: 4.5/5
Number of existing threads: Over 17,000 posts
Of course, DIY-Robotics should also be your primary stop for your robotics questions. Our forum, too, is among the best on the web. We invite you to see what our network of professionals and engineers has to offer.
FANUC has once again raised the bar for cobots with the launch of their new CRX series. The new pair of CRX models, the CRX 10iA and the CRX 10iA/L have established themselves as the new leaders in the field of automation. With several cobot models available, what distinguishes this lineup from other units on the market?
Key Features
FANUC already featured the most extensive line of cobots available. The CRXs offer all the same advantages as the other FANUC cobots, but with a few crucial upgrades and distinctions. Here are just some of the features that set the CRX models apart from their competitors.
Manual Manipulation
Say goodbye to complex matrices and advance programming kinematics. The CRX line can be manipulated by hand and guided to “teach points” so that the human operator can quickly and easily position and pose the robot. By moving it exactly to where it needs to be, the operator can use the robot’s tablet to take a snapshot of that configuration. FANUC’s software takes over from there, making sure the robot gets from point A to point B via the most efficient path. And since it features FANUC’s contact stop function, it is safe for humans to work in this close proximity environment.
The Teach Pendant
The CRX models come with the brand new Teach Pendant Tablet. This sleek, modern touchscreen device features drag-and-drop programming and a quick and straightforward setup. It easily connects to third-party grippers and devices. Plus, it comes loaded with FANUC’s top-of-the-line software like iRPickTool, iRVision, and more!
Small Footprint, Powerful Arm
Although they have smaller footprints than a CR-15, both the CRX 10iA and the 10iA/L can handle a 10kg payload capacity. While they start compact, with a minimal profile, they boast 1249 mm and 1488 mm reaches, respectively.
Out of the Box
What else can you expect right out of the box? For starters, FANUC CRX cobots offer quick setup and a lightweight and compact design. The sleek and smooth surfaces make the units easy, comfortable, and safe to handle. There are no messy wires or sharp corners to frustrate operators during the unboxing or operation.
Once the CRX is out of the box, you’ll find several features that may not make the “top features” list, but which will still make converts out of even the most skeptical consumer. Both models of the CRX operate on standard 120V power. That means you can insert them anywhere in your assembly line as long as you have a standard outlet nearby. Both CRX models easily connect to numerous grippers and vision tools, making it a breeze to get your cobot into your assembly line and working with various third-party hardware. When combined with DIY-Robotics’ mobile Astro cells, the CRX 10iA and the CRX 10iA/L become even more versatile.
DIY-Robotics is a proud FANUC integrator. Check out the list of all of our supported robots and cobots at DIY-Robotics.com/products. While there, take a look at our Payload Calculator, see what our robotic workcells can handle, and decide which ones are the best fit in your factory.
Robotic cells are streamlined, efficient, highly complex machines capable of providing advanced technical solutions. Each cell is tailored to a company’s unique production needs. They are customizable and easy to integrate into your workflow at many different insertion points. Robotic Work cells may be one of the best improvements you can make to your manufacturing business.
What Is a Robotic Cell?
Robotic Work cells, or just robotic cells, contain all of the tools and end-effectors required to perform a specified task or series of tasks. Think of them as automated, fully-housed robots pre-loaded with precisely what they need for each stage of your automation process. Work cells are designed and equipped to handle tasks at numerous points in your assembly line. Robotic cells can be fitted with sensors, grippers, conveyors, and various safeguarding measures like fencing and emergency stop controls.
What Are the Assets of a Robotic Cell?
Work cells are set up to allow robots to operate at peak efficiency and performance. Everything is designed so that the robot can do its job as quickly as possible and with a high level of consistency. Enhanced speed and throughput translates to higher productivity and less down-time.
Safety is also an important asset of a robotic cell. Cells can come equipped with light curtains, e-stops, fencing, and other safeguards to keep employees safe while working within the robot’s vicinity. Speed barriers cease to be necessary because the robot is safely housed within a cellular compartment. The increase in speed equates to an increase in productivity and up-time.
Versatility
Robotic Work cells may only contain one robot. However, this is far from the limit of their capacity. Robotic cells are capable of housing multiple industrial robots. Since Work cells can accommodate various components of differing sizes, weight, and configuration, there are many possible automation solutions achievable by each unit. And while conventional thinking might suggest that adding more tools and sensors would take up more space, the robotic cell maintains the same footprint even when tooling or tasks are added or changed.
Conventional industrial robots are often fixed in place with a security perimeter. Consequently, they are typically dedicated to a single task and location. Conventional industrial robots have large footprints and create downtime when moved in the assembly line.
DIY-Robotics cells, on the other hand, offer swift and straightforward retasking. You can quickly move our robotic cells in and out of your production line. With a simple change in the tooling, you can use the same unit for multiple applications. That is the definition of versatility.
Reduce Direct Labor Costs
The cost of hiring and retaining a person to handle multiple manufacturing operations can add up over the years. A robotic cell, however, provides savings in a relatively short time. Not only does this reduce the cost of human labor, but it can also free up workers to take over higher-order processes such as programming and engineering.
What are the Operations a Robot Cell Can Do?
The most frequent task assigned to robotic cells is pick-and-place. However, this says more about industry need than the robot’s capabilities. Robotic cells can be equipped to handle numerous tasks and provide an enormous variety of automation improvements. Some of the primary tasks a robotic Work cell can handle are:
Sorting
Assembling
Deburring
Painting
Finishing and polishing
Welding (arc welding, spot welding, etc.)
CNC machine tending
Pick-and-place operations are easy to notice, as they are often placed at the beginning or end of assembly lines. But don’t be fooled into thinking that’s all robotic cells can do. Work cells can handle a significant number of your automation needs, more than what’s included in the list above.
Conclusion:
The purchase of a robotic cell might seem to be a costly investment for some small to medium-sized businesses. However, if we look at the numerous advantages that robotic cells bring to production, we realize that the return on investment makes it a worthwhile purchase. A robot cell is a guarantee of fast and seamless improvements to your automation processes. For more information on robotics cells, check out our product page at DIY-Robotics.com. You can also test-drive our virtual “FANUC Build Your Own Cell” configurator to create the ideal cell for your business.
If you read the DIY-Robotics blog or other robotics news, you know that the number of factories incorporating robots is rising. Industrial robots streamline workflow by accelerating cycle times and eliminating bottlenecks. Task automation gets more straightforward with every successive generation of robots. End-users no longer need a degree in computer science to configure the robot’s features. The newest models boast unparalleled levels of user-friendliness with negligible backend-programming requirements. So, with the entire robotics industry booming, it’s essential to know what distinguishes one type of robot from another.In this article, we’re going to look at Cartesian robots, where you might find one, and what makes them an excellent choice for some companies.
What is a Cartesian Robot?
Machines that operate on Cartesian coordinate systems have been staples in factories for decades. 3D printers, laser-cutters, and CNC machines are examples of devices that use the same principle as Cartesian robots. What sets these robots apart from others istheir construction.Cartesian robots are boxy, open, and their primary X-Y directional motion is regulated from above by a rectangular gantry. A lead screw or other linear actuator controls movement in the vertical, Z-direction. All Cartesian robotshave this rectangular configuration, and as a result, they are sometimescalled rectilinear robots or gantry robots.
The Benefits: Strength, Precision, and Accuracy.
Thanks to their rigid structure and boxyconfiguration, Cartesian robots can carry heavy loads. They are excellent at performing pick-and-place tasks, loading and unloading, material handling, and even high precision operations.
When it comes to accuracy, however, several factors determine how well a Cartesian robot will perform over time. If the drive system uses a rubber belt, for example, it may stretch or underperform with loads above a certain weight. Motor encoders, servos, and stepper motors improve travel accuracy as long as the material components are regularly checked or calibrated. Under optimal conditions, a Cartesian robot will exhibit superb accuracy in addition to its other qualities. However, do your due diligence before making a purchase and ensure the materials will withstand regular use.
Work Envelope of a Cartesian Robot
A Cartesian robot’s work envelope is defined by its rectangular structure. Often there is a plate or work area within the boundaries of the X-Y plane. The operational height is bound by the vertical ceiling and the plate or work area. Within this area, there are no “dead zones.” The Cartesian robot has access to every part of the payload that is within this operational cube.
The footprint of a cartesian robot is rectangular and compact. SCARA robots and six-axis robots have oblong work envelopes that create a lot of unusable space around them. Thanks to the predictable, measurable, and well-defined boundaries of the Cartesian robot, factories can incorporate them easily into their existing infrastructure without having to do a lot of calculating first.
What’s the price of a Cartesian Robot?
Due to their simplistic design, primary motor controller, and minimal moving parts, Cartesian robots providesavings over articulated robots. You will also save money by reducing downtime associated with start-up, programming, and troubleshooting. However, articulated robots are more flexible in the long-run. So while you’ll see a lower sticker-price on some Cartesian models, that discount comes at the cost of versatility.
For more information about Cartesian robots or any other types of robots, check out the DIY-Robotics forumsand join a community of industrial robotics specialists and enthusiasts. Feel free to reach out to the team for a free consultation and a custom-tailored cost projection.
Want to know more about Cartesian robots? Join the DIY-Robotics forum for free and ask the community!


 is a well-established professional, educational, and hobbyist resource. Their selection of motors, controllers, hardware, and educational materials are trusted by professionals and students alike. One of the FIRST Robotics program’s primary sponsors, VEX is committed to providing clear, accurate, and updated resources on their forum. You can expect quick replies from knowledgeable professionals who are ready to help with any level of problem.

 Key Features
 The Teach Pendant
 Once the CRX is out of the box, you’ll find several features that may not make the “top features” list, but which will still make converts out of even the most skeptical consumer. Both models of the CRX operate on standard 120V power. That means you can insert them anywhere in your assembly line as long as you have a standard outlet nearby. Both CRX models easily connect to numerous grippers and vision tools, making it a breeze to get your cobot into your assembly line and working with various third-party hardware. When combined with DIY-Robotics’ mobile